Building your own wooden laptop desk isn’t just about crafting a piece of furniture; it’s about tailoring a workspace that fits your lifestyle and boosts productivity. A custom desk offers the convenience and comfort that prefabricated desks often miss out on.
Remote work is on the rise, making a personalized workspace more relevant than ever. An adjustable, ergonomic desk can help keep those work-from-home days comfortable, encouraging better posture and reducing fatigue. Having a desk that suits your unique workflow can make all the difference when you’re tackling that never-ending to-do list.
Let’s talk aesthetics and sustainability. Wooden desks inherently add warmth and character to any room. Plus, when you opt for sustainably sourced wood, you’re making an environmentally friendly choice that respects our planet. Besides, wood is super versatile, letting you infuse your personal style into the design. Whether you prefer sleek and modern or cozy and rustic, a wooden desk is your canvas.
Lastly, it’s all about the pride and satisfaction that comes from creating something with your own two hands. Crafting your desk means you have full control over every feature and finish, ensuring it meets all your needs from functional to decorative.
Selecting the Right Type of Wood: Easy and Durable Options
Picking the right wood for your laptop desk is like setting the foundation for a solid house; it’s essential for creating a durable, long-lasting piece. The wood you choose will determine not only the desk’s sturdiness but also its appearance and ease of construction.
Think about durability and finish. Hardwoods like oak, walnut, and maple are go-to choices if you’re aiming for longevity and a premium look. They withstand the wear and tear of everyday use, looking stylish while doing it. If you prefer something lighter, pine or plywood can be a budget-friendly option that’s easy to work with, though it might need a bit more TLC along the way.
Eco-friendly living is all the rage, and sourcing sustainable wood is a great way to contribute. Look for woods certified by organizations like the Forest Stewardship Council (FSC) to ensure you’re making an environmentally conscious choice. Bamboo is another cool option—it’s a fast-growing and highly renewable resource that’s strong and visually appealing.
Practicality matters. Some woods are easier for beginner craftsmen to handle. Pine, for instance, is softer and generally easier to cut and drill, making it a beginner’s best buddy. Maple, though tougher, offers a beautiful smooth finish if you don’t mind putting in some extra elbow grease.
Weighing these factors will help you decide on a wood that’s not only functional but also aligns with how you want your desk to look and feel. The goal is to create something beautiful and practical that’ll serve you well, day in and day out.
Designing Your Desk: Balancing Form and Function
Designing your wooden laptop desk is like piecing together a puzzle—each element should fit both your taste and your needs. Ergonomics plays a crucial role here. Ensuring your desk allows comfortable usage can significantly impact your productivity and health. Aim for a design that accommodates your chair height and your eye level, preventing any potential strain on your back or neck.
Style and space configuration are up next. Whether you’re working in a spacious home office or squeezing into a cozy apartment corner, your desk’s design should complement your environment. Consider L-shaped desks for corner spaces or sleek, minimalist designs for smaller areas. This customization ensures your desk isn’t just a stand-alone entity, but an integral part of your room’s layout and vibe.
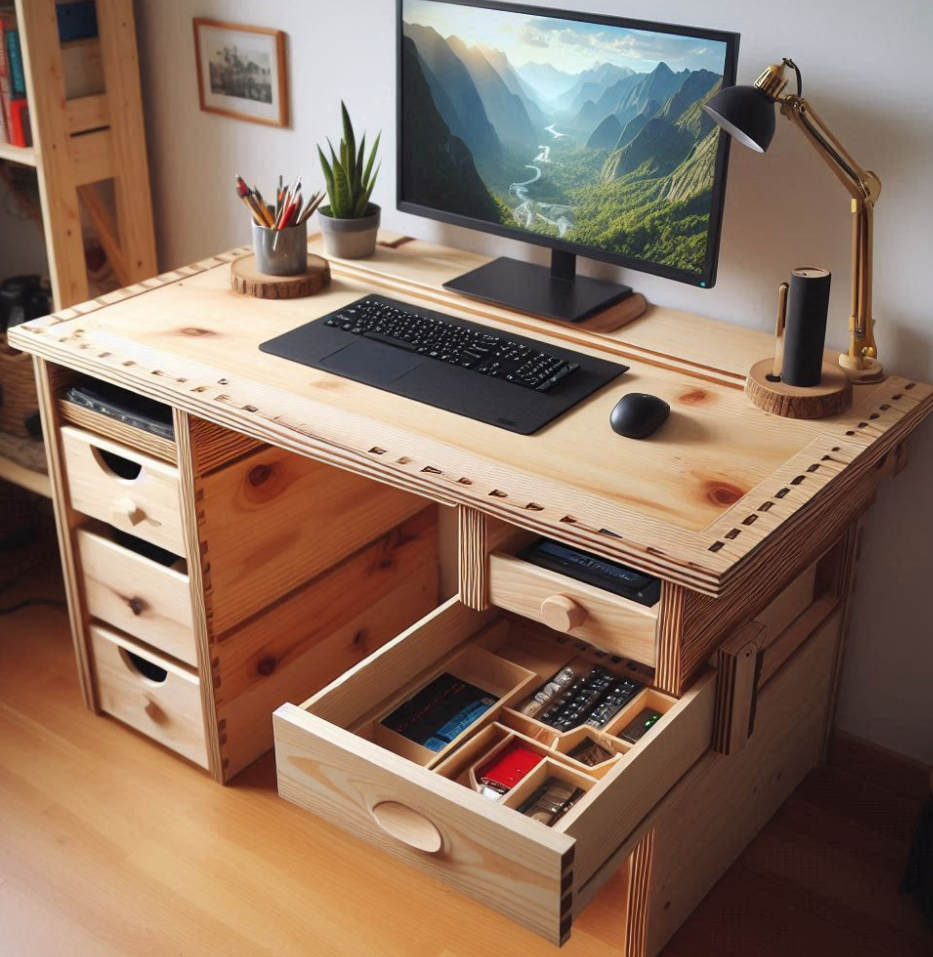
Functionality can’t be overstated. Think about the essential features that will make your workday smoother. Built-in cable management systems can eliminate clutter and make your workspace look tidy. Including shelves or drawers can offer handy storage solutions for your documents and gadgets. A well-ventilated design will also prolong the lifespan of your laptop by preventing overheating.
Ultimately, your desk should reflect both practicality and personal style, making workdays more productive and enjoyable.
Gathering Tools and Materials: What You’ll Need
Before you start cutting and assembling your desk, having the right tools and materials is like having a reliable toolkit for any DIY project. It makes construction smoother, safer, and a whole lot more enjoyable.
Here’s the rundown on what you’ll need: A reliable saw—whether it’s a handsaw or a power saw, depending on your comfort and skill level—will handle most of your cutting tasks. A drill (cordless for convenience) will make holes precise and screw driving a breeze. Sandpaper helps create that all-important smooth finish, while clamps are necessary to hold things steady as you work.
Let’s not forget the safety gear. Goggles, gloves, and a dust mask are non-negotiables; they keep you protected from sawdust and accidental slips that might occur. Safety doesn’t take a holiday, even for something seemingly simple as building a desk.
When it comes to materials, you’ll need screws and wood glue for joining, nails if your design calls for them, and a good quality sealant to protect your wooden masterpiece from everyday wear and spills. None of these items are outrageously costly, but they make a big difference in your desk’s durability and finish quality.
Having an organized checklist with everything accounted for can save you that frustrating extra trip to the store. Plus, starting each step with all the tools laid out will keep your workflow uninterrupted and efficient.
Crafting the Perfect Desk: Step-by-Step Construction Guide
Let’s get into the meat of the project: building this beauty. Start by cutting your wood to size according to your design blueprint. Accurate measurements are crucial. “Measure twice, cut once”—this old saying is a lifesaver when you’re trying to fit pieces together without a hitch.
With your pieces ready, it’s time for assembly. Begin by joining the tabletop pieces if needed, using wood glue for a strong bond. Use clamps to hold things in place as the glue dries. For added stability, screws or nails should be used along the joints. This keeps everything firmly together, giving you peace of mind.
Precision is key, especially with aligning your legs and cross supports. Misalignment can cause wobbling, which nobody wants. A spirit level can be your best friend here, ensuring everything is nice and straight from the get-go.
While construction might seem daunting, keeping a steady pace and reviewing each step can reduce missteps. Watch out for common pitfalls like cutting errors and misaligned joints by checking each step before moving on. Keeping the workspace tidy helps keep focus in line too.
Remember, patience is as important as precision. You’re building a desk that’s meant to last, not just for a quick fix. Take your time to double-check each segment, ensuring all components fit just right. A little extra attention to detail now can save you a lot of trouble down the line.
Finishing Touches: Sanding, Staining, and Sealing
With your desk all put together, it’s time to give it that refined look and feel. Sanding is your first stop. A thorough sanding will smooth out any rough edges and prepare the surface for staining or sealing. Start with a coarser grit sandpaper (80 grit) and gradually move to a finer grit (probably to a 220 grit) for that silky finish. Don’t rush this part—smooth surfaces will make the staining process even and beautiful. Ensure the surfaces are dust free.
Picking your stain is next. The color can dramatically change the look of your desk, so choose wisely. Consider how it’ll fit with the rest of your room and your personal taste. Whether you want a light, natural look or something dark and sophisticated, test a small piece of scrap wood from the project first. This way, you’re absolutely sure about how it interacts with your chosen wood.
Sealing ensures your desk stands up to daily use. A good sealant protects the wood from coffee spills, wear, and even little scratches. It can also enhance the shine of your stain, adding a layer of depth to the wood’s appearance. There are plenty of options out there: polyurethane is a favorite because it offers tough, lasting protection.
Take care to apply your stain and sealant in thin, even coats. This prevents unsightly drips and helps it dry quicker and more uniformly. Allow each coat to dry fully before applying the next—patience here pays off with a flawless finish.
These finishing touches are not just about aesthetics; they’re about ensuring your desk can withstand the tests of time and use, maintaining its beauty and functionality for years to come.
Personalizing Your Desk: Adding Custom Features
Now that you’ve got the core desk ready, it’s time to make it your own with some cool custom features. Adding these personal touches can transform it from just another piece of furniture into something uniquely yours.
Consider adding drawers or shelves to boost storage. They’re perfect for tucking away notebooks, chargers, or anything else that might clutter your desk. If you’re a bit tech-savvy, think about installing built-in charging stations. Having a spot where your devices can dock without a sea of cables adds both function and style.
Decor elements like a splash of color or some creative carving can reflect your personal taste. Whether it’s a simple paint job or intricate woodburns, these touches can set your desk apart. If you’re into plants, maybe leave space for some greenery—plants add a fresh vibe and a bit of color to any workspace.
Think about ergonomic features that could make your workday more comfortable. Adjustable shelves or a keyboard tray that can slide out might look complicated, but they’re game-changers for posture and comfort.
These tweaks can take your desk from just functional to a standout piece that fits perfectly into your lifestyle and workspace. It’s these details that make all the difference, giving you a workspace that’s not only efficient but also feels like your personal domain.
Maintaining Your Wooden Desk: Tips for Longevity
After putting in so much effort to craft your perfect desk, keeping it in top shape is the next step. Regular maintenance can ensure your desk stays as good as new through all those busy workdays.
Routine care like dusting the surface regularly prevents buildup that can lead to scratches. For those unexpected spills, having a cloth or a paper towel handy can make cleanup quick and easy. Quick action goes a long way in preventing stains and water damage.
Handling minor scratches and dents doesn’t have to be a headache either. Use touch-up markers or a bit of matching stain to disguise those little imperfections that come with everyday use. Remember, sometimes they add a touch of character to your wooden desk!
Environmental changes like humidity and temperature can affect wood over time. During season changes, ensure your desk isn’t sitting in direct sunlight or next to heating vents. This can help prevent warping or cracking, keeping the wood in pristine condition.
Consider applying a fresh coat of sealant every couple of years to reinforce protection and keep your desk looking vibrant. A little effort now and then can extend the lifespan of your handcrafted piece considerably.
Conclusion: Enjoying Your Functional Wooden Desk
You’ve journeyed from raw materials to a fully functional, personalized workspace that boosts your productivity and showcases your craftsmanship. This desk isn’t just about utility; it’s a testament to your hard work and creativity, offering both a practical workspace and a unique piece of home décor.
Think of the boost in morale each time you sit down to work at something you’ve crafted with your own hands. It’s not just a desk—it’s a reminder of diligence, skill, and care. Whether you’re handling everyday tasks or embarking on big projects, having the right workspace can truly make a difference.
Hopefully, this project has also sparked a deeper interest in DIY. Building a functional wooden laptop desk isn’t the end; it’s a stepping stone to more woodworking adventures. Who knows? You might find yourself planning your next project before you know it!
The satisfaction of working on and completing a DIY project is hard to beat. Enjoy every moment spent at your desk, knowing it’s been made to fit your space and style perfectly.
I am attaching a link to a you tube video of a guy making a Functional Laptop Desk.
Lap Desk BUILD! Perfect for working in bed
No responses yet