 using WordPress and
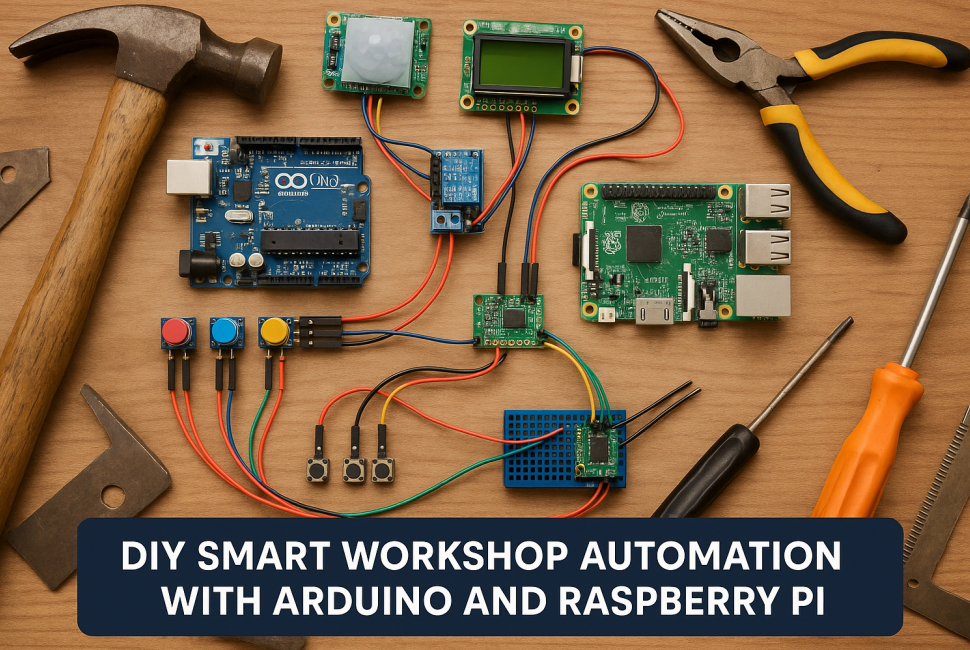
In today’s tech-savvy world, having a smart workshop isn’t just for the pros. It’s all about making life easier, more efficient, and honestly, a bit more fun. Imagine your tools and systems running smoothly with just a few taps or even automating themselves. That’s what smart workshop automation brings to the table.
At the heart of this transformation are Arduino and Raspberry Pi, two of the most versatile and accessible platforms for hobbyists and professionals alike. Arduino’s great for basic projects and quick prototyping, offering a hands-on approach to automation. Meanwhile, Raspberry Pi serves as a small but mighty computer, ready to handle more complex tasks with its processing power.
So, why bother automating your workshop? First, it boosts productivity by minimizing manual tasks. Less manual labor means more time for creativity and craftsmanship. Also, automation can enhance safety, enabling better control over potentially dangerous tools and environments. Plus, precise control over tools and systems can lead to better outcomes in your projects.
This section jumps into the world of Arduino and Raspberry Pi, setting the stage for your journey into smart workshop automation. It’s about starting simple and growing into more ambitious projects. Whether you’re a beginner or an experienced tinker, integrating these platforms into your workshop opens up incredible possibilities.
Choosing the Right Components
Getting the right gear is step one in setting up your smart workshop. When it comes to processors, the big debate often starts with choosing between Arduino and Raspberry Pi. Both have their strengths, but your choice should boil down to what you need. If you’re after simple control tasks, Arduino might be your best bet. For more complex, multitasking projects, Raspberry Pi could be the way to go.
Every smart workshop relies on a set of key components beyond just the processors. Think sensors, relays, and a reliable network setup. Sensors let you gather essential data, like temperature or motion, while relays help automate the power supply to your gadgets. And don’t underestimate the value of a robust, stable internet connection when setting up remote controls or data logging.
Finding quality components can be as tricky as building the projects themselves. Turn to reputable suppliers who provide detailed product information and good customer feedback. Online communities and forums can also be a treasure trove of advice on where to snag the best deals without sacrificing quality. Cornering the right components ensures that your setup will be dependable from the start.
Setting Up Your Arduino Environment
The first step in unlocking Arduino’s potential is getting the environment set up. Start by downloading the Arduino IDE, which is the Integrated Development Environment you’ll use to write and upload codes to your Arduino board. Fortunately, installation is straightforward and available for various operating systems, so it won’t take long before you’re ready to go.
Once you’ve got the IDE running, it’s time to dip your toes into the world of Arduino programming. Begin with basic sketches, which are essentially small programs, to familiarize yourself with the syntax and functionality. The Blink sketch is a classic starting point, allowing you to control an LED light relatively easily. This simple project gives you hands-on experience and a confidence boost.
Even with straightforward projects, you’ll run into some hiccups along the way. Many newcomers face the dreaded compilation errors or hardware not responding as expected. Don’t worry, it’s all part of the learning curve. Forums and official guides are great resources for troubleshooting these issues. Picking up problem-solving skills now will make tackling more complex projects later a breeze.
Raspberry Pi: From Setup to Execution
Setting up your Raspberry Pi can seem daunting, but it’s all about breaking it down step-by-step. First, you need to load an operating system onto your SD card. Raspberry Pi OS (formerly Raspbian) is the go-to choice for most beginners due to its user-friendliness and stability. You can do this using tools like the Raspberry Pi Imager, which simplifies the process significantly.
Once your Raspberry Pi is up and running, you’ll need to get acquainted with its operating system. Unlike traditional PCs, Raspberry Pi uses a Linux-based OS, so having some basic Linux command knowledge will be beneficial. Dive into the terminal, explore the file system, and try basic commands to feel more comfortable operating within this environment.
Programming with Raspberry Pi is where the real fun begins. You’re not just limited to connecting a keyboard and monitor; consider SSHing into your Pi to control it from another computer. Python is the most popular language for programming your Raspberry Pi, especially for beginners. Working through simple scripts to control your hardware will help you build a solid foundation.
As with any technology, expect some trial and error. An error message may pop up, or the Raspberry Pi might not boot as expected. It’s important to stay patient and use the many resources available online, from community forums to detailed tutorials, which will guide you through the troubleshooting process. These challenges are part of the journey and learning from them will make you more competent and confident in managing your projects.
Integrating Arduino and Raspberry Pi: The Perfect Duo
Pairing Arduino and Raspberry Pi can elevate your smart workshop to new heights, combining the strengths of both platforms. While Arduino excels in handling sensors and actuators with precision, Raspberry Pi offers the computational power and versatility for more sophisticated tasks like data processing and web management.
One of the simplest integration projects involves setting up a communication bridge between these two devices. You can use a serial connection, allowing them to exchange data seamlessly. Think of using the Arduino to collect sensor data, which the Raspberry Pi can then analyze or even upload to the cloud for monitoring purposes.
Synchronizing these devices opens up a world of possibilities. Imagine creating a unified automation system where Raspberry Pi manages high-level instructions, while Arduino handles real-time controls. This setup is not only efficient but also scalable—ideal for growing your project’s capabilities over time.
To get started, explore sample integration projects online. Many development communities provide open-source projects that can guide you through the first steps. Understanding how to manage data flow and task allocation between the two platforms will empower you to create more robust automation systems.
Don’t hesitate to experiment with different setups and configurations. Flexibility is the real beauty of using Arduino and Raspberry Pi together. As you tweak and refine your systems, the deeper understanding you gain will make every project more successful.
Building Your First Smart Project
Creating a smart lighting system in your workshop is a fantastic way to start. This project lays the groundwork for more advanced tasks as you get familiar with both Arduino and Raspberry Pi in a real-world setup. Begin by gathering your core components: an Arduino board, some basic sensors, a relay module, and energy-efficient LED lights.
Start by wiring the components following a schematic, ensuring connections are secure and correct. Use the Arduino to read input from sensors—like motion detectors or light sensors—that dictate when the lights should switch on or off. In essence, your Arduino acts as the brain for receiving inputs and controlling the relay that toggles the lights.
Coding is the next step, and working through Arduino’s straightforward language to get your sensors and lights to communicate effectively is key. Simple scripts will make sure that when your sensor detects movement or a specific light level, the relay activates, and lights respond accordingly. Upload your sketch via the Arduino IDE, and with some luck, you’re good to go.
Testing is all about verifying that each component works as expected. Check if sensors trigger the lights properly and adjust sensitivity or timing in your code as necessary. This not only ensures your current project functions well but builds your skills for troubleshooting and optimizing future projects.
Troubleshooting is just part of the game. Maybe your lights aren’t turning on right away, or the sensor isn’t as responsive as you’d like. Dive into community forums or revisit your wiring and code. Small adjustments often yield big improvements, so keep testing until satisfied with the outcome.
Advanced Automation Ideas
Introducing sensors to your setup can significantly enhance your workshop’s capabilities. Consider using environmental sensors to monitor temperature, humidity, or even air quality. This enables not only automation based on environmental conditions but also ensures a safer and more comfortable working space.
Automating power tools adds an external layer of efficiency and safety. Implement sensors that detect motion or proximity, enabling tools to turn on or off automatically. This minimizes energy usage and the need for manual intervention, thereby reducing the risk of accidents.
Remote controlling and monitoring your workshop through apps or web interfaces marks a significant step up. With a Raspberry Pi running a web server, you can create a centralized interface to control all your components. This setup not only offers convenience but also lets you keep an eye on your workspace from anywhere.
Exploring integration with smart home devices like Alexa or Google Home can bring voice control into your workshop. Program your systems to respond to voice commands, creating a seamless blend of home and workshop automation tailored to your daily needs.
Experiment with data logging to track and analyze your workshop’s environment and equipment performance over time. Using databases or cloud services to store this information lets you identify patterns or deficiencies that can be optimized for better productivity.
Ensuring a Secure and Reliable System
Security in any automated system is crucial, especially when smart devices handle crucial tasks in your workshop. Start by securing your network. Ensure your Wi-Fi is protected with a robust password, and use secure protocols for any device connected to the internet.
Software updates should be automated to maintain reliability and security. Both Arduino and Raspberry Pi benefit from periodic updates that patch vulnerabilities and improve functionality. This can often be set to run seamlessly in the background, ensuring your system is always up to date without manual intervention.
Building a backup system is an often-overlooked yet critical component. Consider using an additional Raspberry Pi or an external drive as a backup for crucial data and project setups. This ensures that should any component fail, you can rapidly recover without significant downtime.
Setting up user permissions is another layer of security. Not all users require full access to your system, so assigning roles ensures no accidental (or intentional) tampering with your settings or projects. Keep access restricted and log any changes made to your setup for an added layer of accountability.
Evaluate the physical security of your setup, too. Proper housing for your boards away from dust, moisture, and physical damage prolongs their life and reduces the risk of unexpected malfunctions. Regularly inspect your components for wear or damage, and replace any questionable parts immediately.
Conclusion: Embracing the Future of DIY Automation
Smart workshop automation is less of a distant dream and more of an approachable reality. By integrating technology like Arduino and Raspberry Pi, you can transform how your workshop functions, enhancing both efficiency and creativity.
The possibilities stretch as far as your imagination. Once you’ve grasped the basics and overcome initial challenges, the groundwork is laid for more complex automation projects. Each success not only boosts your skills but also fuels your confidence to explore more ingenious solutions.
Innovation thrives when you start small and build incrementally. The systems you develop don’t just solve immediate problems; they represent a growth journey in analytical and technical skills. Plus, the satisfaction of seeing a project come to life is unparalleled.
As you continue to adapt and expand your systems, remember the importance of community and shared knowledge. The open-source community around Arduino and Raspberry Pi is incredible, offering a treasure trove of resources and support.
Looking forward, aim to push boundaries and shape your workspace to suit your evolving needs. Harness the power of technology in your workshop—whether for better efficiency, enhanced safety, or a touch of futuristic flair.
Facebook Link for Raspberry Pi
No responses yet